Creating custom layouts on TradingView mobile is one of the most powerful features for serious traders. Whether you're building a layout for scalping Bitcoin, analyzing swing trades in forex, or tracking long-term commodity trends, the ability to save and organize your chart configurations will transform your trading workflow.
Step-by-Step: How to Create a New Layout on TradingView Mobile
Step 1: Access the Menu by Clicking the Three-Dot Icon
Just like switching layouts, creating a new one begins with accessing the menu. Look at the bottom toolbar of your TradingView mobile chart screen and locate the three-dot menu icon (⋯).
Location: The three-dot menu is typically found in the bottom right corner of your chart interface, next to other tools like indicators, drawing tools, and settings.
Pro Tip: Make sure you're in the Chart tab when accessing this menu. The chart tab is the second tab in your navigation bar at the top of the screen (after Watchlist and before Explore).
Step 2: Click on "New" (Instead of "Open")
Once you've tapped the three-dot menu, a dropdown menu appears with several options. This time, instead of clicking "Open" (which we used to switch to existing layouts), you'll look for the "New" option.
Tap on "New" to create a fresh, blank layout.
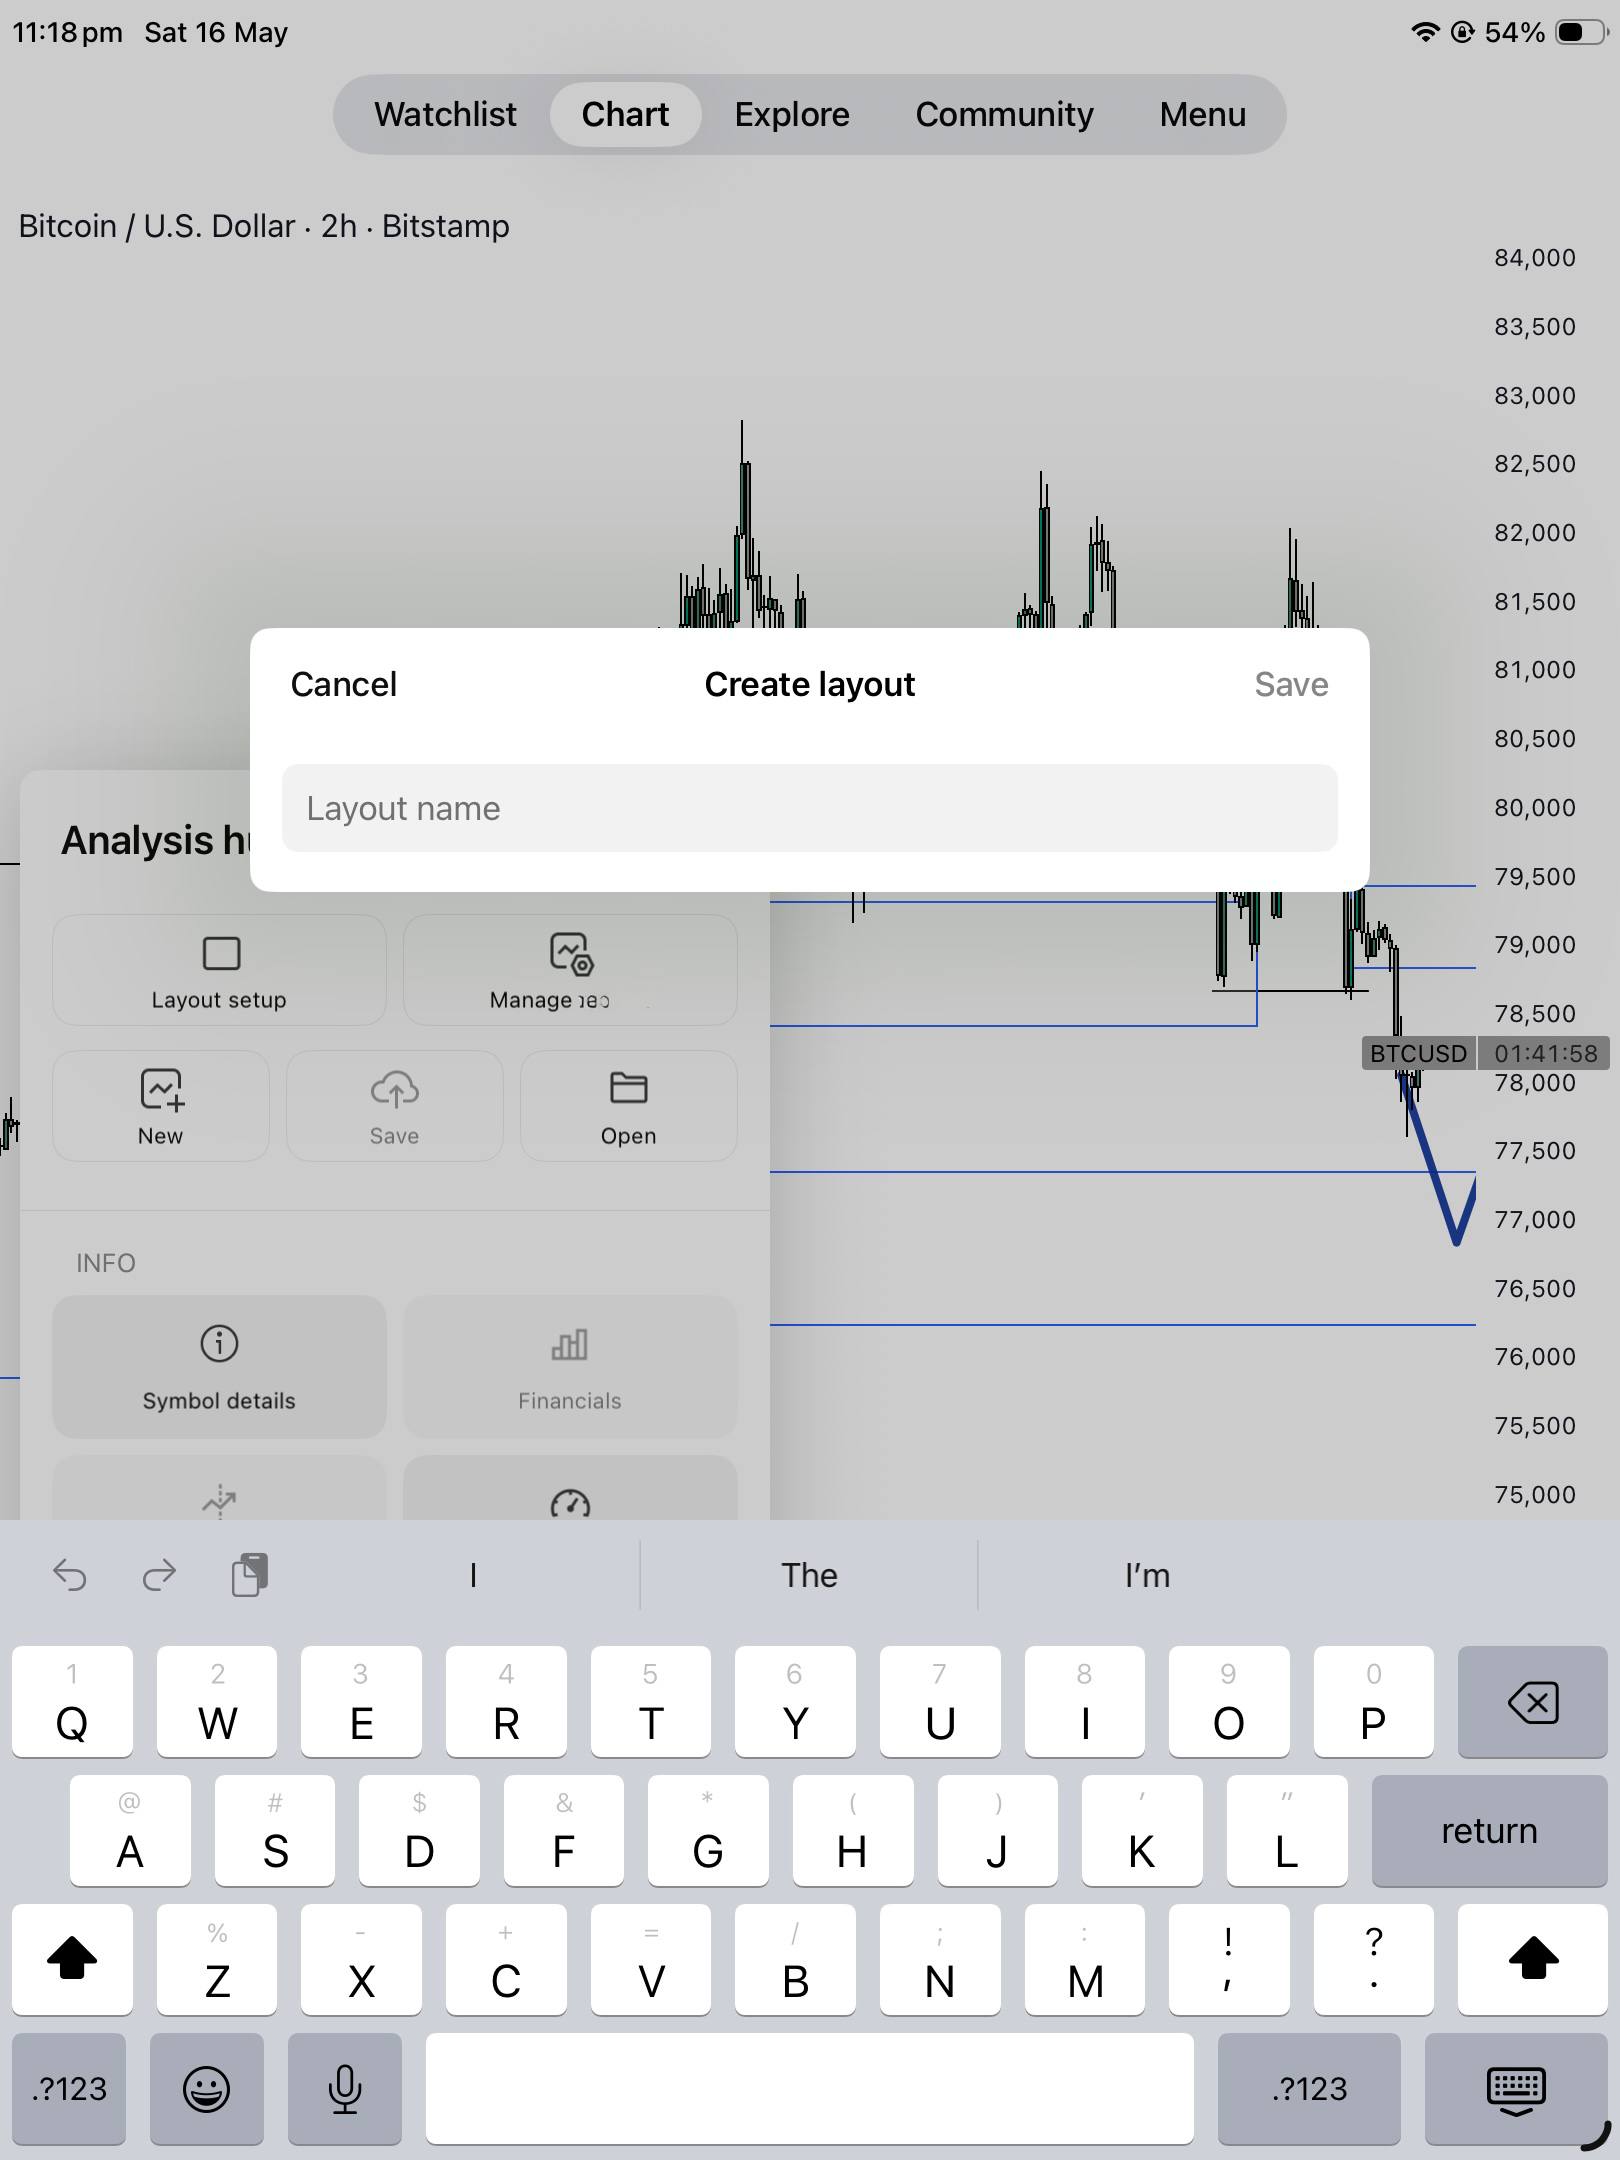
What You'll See: The menu includes options like:
- Layout setup — Configure layout-specific settings
- Manage Adeola — Manage your layouts
- New — Create a new layout (this is what we want!)
- Save — Save your current chart configuration
- Open — Load an existing layout
Make sure you're selecting "New" and not one of the other options. This is the crucial step that initiates the layout creation process.
Step 3: Enter Your Layout Name in the Pop-Up Dialog
After clicking "New," a "Create layout" dialog box will pop up on your screen. This is where you name your new layout.
What You'll See in the Pop-Up:
The dialog displays:
- "Create layout" as the header
- "Layout name" as a text input field
- "Cancel" button on the left
- "Save" button on the right (grayed out until you enter a name)
Enter a descriptive name for your layout in the text field. This is your opportunity to create a clear, organized naming convention that makes it easy to identify your layout later.
Step 4: Tap "Save" to Create Your Layout
Once you've entered your desired layout name, the "Save" button on the right side of the dialog will become active (it changes from gray to clickable).
Tap "Save" to create your new layout.
What Happens Next:
- Your layout is created and saved
- The dialog closes
- You're returned to your chart
- Your new blank layout is now active
At this point, you have successfully created your new layout! However, the work isn't finished—your layout is essentially blank right now. The next phase is to configure it according to your trading needs.
Configuring Your New Layout: The Next Steps
After creating your layout, you'll want to customize it to match your trading strategy. Here's what you should do:
Add Your Indicators
Access the indicators menu and add the technical indicators you want to use.
Configure Drawing Tools
Set up your preferred drawing tools for technical analysis:
- Trendlines
- Support and resistance levels
- Fibonacci retracements
- Channels
- Annotations
Adjust Chart Settings
Customize the visual appearance:
- Timeframe selection
- Chart type (candlestick, OHLC, etc.)
- Grid and scale settings
- Color preferences
Set Your Preferred Alerts
Configure alerts for price levels or indicator conditions that matter to your strategy.
Save Your Configuration
Once you've configured all your settings, make sure to save your layout again using the "Save" option from the three-dot menu. This ensures all your customizations are preserved.
I Want to Delete My Layout
Go to the three-dot menu, click "Open," and find your layout in the list. Tap the trash icon next to the layout name to delete it. Be careful—this action is typically permanent.
Conclusion
Creating a new layout on TradingView mobile is a straightforward four-step process:
- Click the three-dot menu
- Select "New"
- Enter your layout name (with a clear, descriptive title)
- Tap "Save" and begin configuring
Happy trading, and happy layout creating!